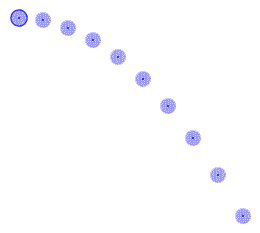

A particle model track is a mathematical model of a point mass. The step positions of the particle are determined by the parameters of the model rather than being marked with the mouse.
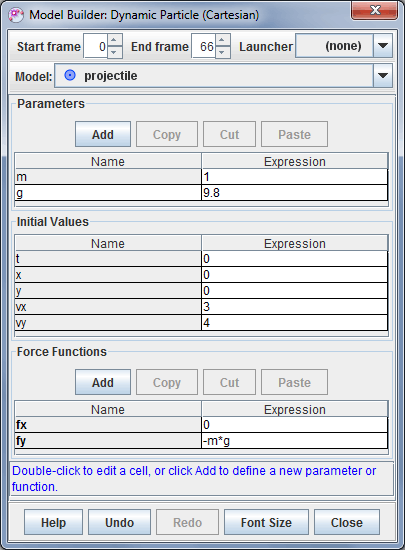
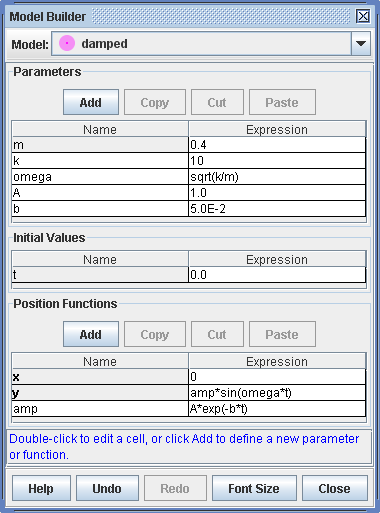
There are two types of particle models: kinematic and dynamic. A kinematic particle defines position functions of time (Figure 4), while a dynamic particle defines force functions and initial conditions for numerical ODE solvers (Figure 1). Dynamic particles may be defined in either cartesian or polar coordinates.
Model particles have a start and end frame that define the frames of the video in which they are drawn. This makes it possible to define multiple models that apply at different times in the same video.
A dynamic particle may use a launcher (point mass) to set its initial position and velocity. Launchers can be quite powerful--for more information, see Launching dynamic particles.
A particle model has a settable mass and generates motion data and vectors just like any other point mass. See point mass for additional information.
A particle model can create a stamped point mass which clones the model's current positions. The stamped point mass positions don't move when you change scale. For more information see Stamping a point mass.
Particle model properties are displayed and edited using the Model Builder tool. To use the builder, choose Model Builder... from the model's track menu.
Functions and parameters are defined by entering expressions that are "parsed" (interpreted) by the OSP parser. The values of parameters are constants while those of functions depend on input variables such as x, y, t, etc. The parser recognizes the following elements:
| abs(x) | acos(x) | acosh(x) | asin(x) | asinh(x) | atan(x) | atanh(x) | atan2(y,x) | ceil(x) | cos(x) |
| cosh(x) | exp(x) | frac(x) | floor(x) | int(x) | log(x) | max(x,y) | min(x,y) | mod(x,y) | random(x) |
| round(x) | sign(x) | sin(x) | sinh(x) | sqr(x) | sqrt(x) | step(x) | tan(x) | tanh(x) |
Model Builder displays model functions along with associated parameters and initial conditions in tables with Name and Expression columns as shown in Fig. 1. The name of the model is shown in a spinner field above the tables. Hovering over a name cell shows its description.
To create a new parameter or support function, click the appropriate Add button.
To edit a name or expression, double-click its table cell (gray cells cannot be edited). Names must be unique and can contain no spaces or mathematical symbols. Expressions must be valid mathematical expressions parsable by the OSP parser. To set the description of a Name table cell, right-click it.
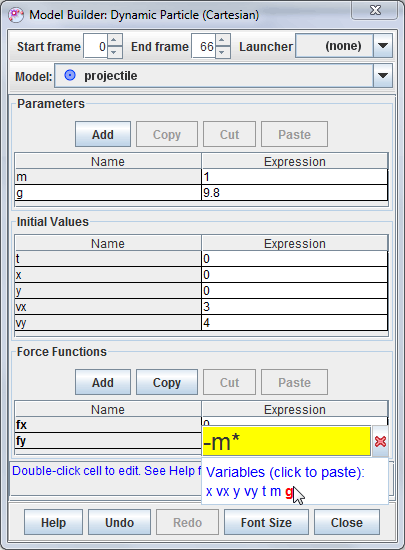
When editing an expression, the names of all available variables are listed in blue directly under the popup editor as shown in Fig. 2. To insert a variable directly from the list, move the mouse cursor over it until it turns red and then click.
Variables for parameter expressions include only other parameters, while variables for function expressions include independent variables (e.g., x, y, t, etc), parameters and support function names. In the example shown, the "fy" function may depend on any or all of the variables x, vx, y, vy, t, m, g. The entry "-m*g" is thus a valid expression.
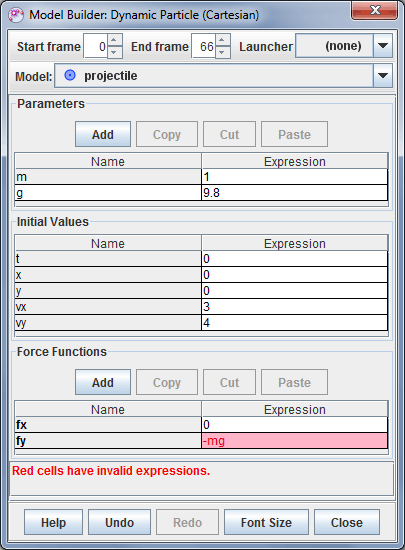
If an invalid expression is entered into a cell the cell turns red and an error message is displayed in the status bar. In Figure 3, the expression "-mg" is invalid since the multiplication operator (*) has been omitted. Circular references also result in an error condition.
Model Builder includes several features designed to help build, modify and compare models quickly:
Numerical values can be easily adjusted by clicking in a green control area and dragging the mouse to the right or left. The control area is displayed below the list of variables in the popup editor whenever the expression is a number as shown in Fig. 5.
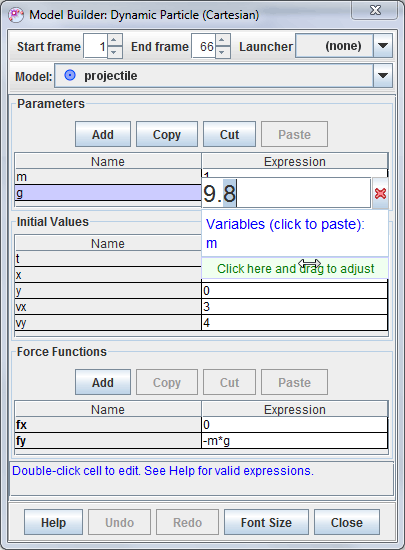
Both coarse and fine adjustments are possible. To make coarse adjustments, click the mouse near the left end of the control area and drag. For finer adjustments, click near the right end. The highlighted digit shows the adjustment increment. For example, clicking and dragging at the point shown in Fig. 5 will adjust the value of "g" in increments of 0.1.
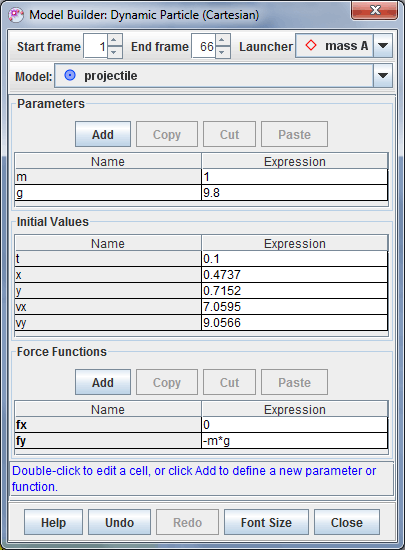
A launcher is a separate point mass that sets the position and velocity of a particle model to those of the launcher at the model's start frame. If the launcher's position or velocity changes, the model's initial conditions are automatically updated. Note: if the launcher's position is not defined at the model's start frame, it has no effect. If the launcher's position is defined but not its velocity, then only the model's position is set.
There are at least 3 ways to use launchers:
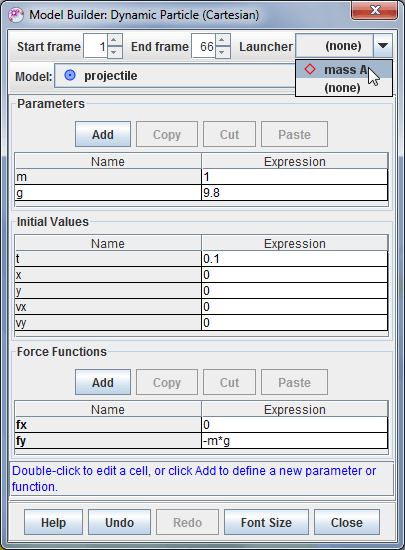
To define a launcher for a dynamic particle model, select it from the dropdown Launcher list in the model builder as shown in Fig. 6. The model's initial conditions are automatically updated to match the motion of the launcher at the model's start frame.

The positions of a model's steps (on the video image) are determined by (a) the model expressions, parameters and/or data and (b) the origin, tilt and scale of the coordinate system. This means if you change the axes or the calibration of the video the steps will move. But sometimes it is useful to have the steps behave like a standard point mass: stay fixed on the image so when you change the coordinate system the steps don't move but instead the world data changes. Creating a point mass that clones a model is called stamping a point mass.
To stamp a point mass from a model, choose the Stamp Point Mass menu item from the model's track menu. For an External Model, the Stamp Point Mass item is in the Points submenus. The stamped point mass is given the name of the model plus "stampX" where X is a number. A single model may stamp multiple point masses with varying parameters for comparison or editing.